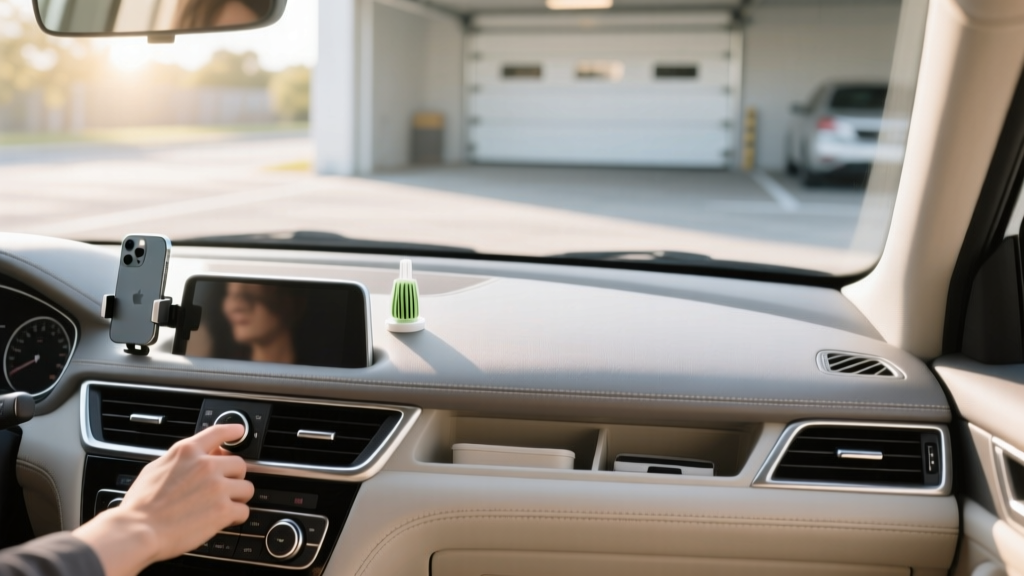
Dashboard Cleaning Handbook: Beginner Tips (2026)
If you?ve already learned the basics of dashboard cleaning, the next step is getting consistent, professional-level results without wasting time?or accidentally damaging modern interior materials. Today?s dashboards aren?t just ?plastic.? Many are soft-touch vinyl, coated polymers, stitched leather, textured rubberized trims, piano-black panels, and delicate screens all living inches apart. Each surface behaves differently, and using the wrong product (or the wrong towel) can leave streaks, shiny patches, or permanent discoloration.
This Part 2 handbook focuses on technique, product selection, and real-world scenarios: sticky grime around buttons, sunscreen residue, dust that returns overnight, streaky glare on the windshield-side edge, and those hairline scratches that seem to appear out of nowhere. If your goal is a clean, factory-matte look that stays clean longer, you?re in the right place.
Expect step-by-step workflows, product comparisons, and the most common beginner mistakes?so you can clean faster, safer, and with results you?ll actually be proud of.
Before You Touch the Dashboard: Quick Assessment Checklist
Two minutes of inspection saves you from most cleaning mishaps. Take a breath, open the doors for airflow, and do a quick survey.
- Surface types: soft-touch dash, textured vinyl, leather-wrapped areas, piano black trim, infotainment screen, gauge cluster lens.
- Soil type: loose dust, oily film (skin oils), sticky residue (sugary drinks), sunscreen, pet hair, or smoke film.
- Heat level: if the car?s been sitting in the sun, let the cabin cool first to prevent streaking and product flash-drying.
- Existing damage: peeling soft-touch coating, cracked leather, scratched clear plastics?these require extra gentleness.
Pro Tip: Test Spots Are Non-Negotiable
Always test any new cleaner or protectant on a hidden area (lower dash or inside glovebox lip). Soft-touch coatings and aftermarket trim pieces can react unpredictably.
Tools and Products: What You Actually Need (and What to Skip)
Must-Have Tools for Beginner-Friendly Results
- Microfiber towels (at least 6): separate towels for cleaning, drying/buffing, and screens. Use plush or short-nap depending on the surface.
- Detailing brushes: one soft interior brush for vents and seams; one small, ultra-soft brush for buttons/emblems.
- Compressed air or a blower (optional): helps clear vents, seams, and tight button gaps.
- Vacuum with a soft brush attachment: pulls dust out instead of pushing it around.
- Foam or microfiber applicator pad: for protectants on larger dashboard areas.
Cleaners: A Practical Comparison
You don?t need a cabinet full of chemicals. You do need the right strength for the grime you?re dealing with.
- Interior quick detailer: best for light dust and fingerprints. Leaves a natural finish when used correctly.
- Dedicated interior cleaner (pH-balanced): your main workhorse for general dashboard cleaning.
- Dilutable all-purpose cleaner (APC): use only when needed and dilute appropriately. Great for stubborn grime on hard plastics, but can be too harsh for soft-touch or coated surfaces.
- Screen-safe cleaner: designed for infotainment screens and gauge lenses to reduce streaks and scratching risk.
Protectants: Matte, Not Greasy
A good dashboard protectant improves UV resistance and makes future cleaning easier. The finish matters just as much as the protection.
- Matte/natural interior protectant: ideal for most modern interiors?keeps the factory look and reduces glare.
- Glossy ?shine? dressings: generally best avoided on dashboards. They attract dust, can look oily, and may increase windshield glare.
Safe Product Characteristics to Look For
- Non-greasy, low-sheen finish
- UV inhibitors (for sun-heavy climates)
- Clear labeling for interior use (dash/vinyl/plastic)
- Ammonia-free and alcohol-light or alcohol-free for sensitive displays
Step-by-Step: The ?Clean, Detail, Protect? Dashboard Workflow
Step 1: Dry Remove Dust (Don?t Grind It In)
- Vacuum first using a soft brush attachment across the dash surface and around vents.
- Brush second (soft detailing brush) to pull dust from seams, speaker grilles, and button edges.
- Wipe last with a clean, dry microfiber to pick up what?s left.
Real-world example: If you wipe a dusty dashboard with a damp towel first, you often create muddy streaks that dry into a haze?especially on textured vinyl.
Step 2: Clean Using the Right Amount of Moisture
- Lightly mist cleaner onto the towel, not directly onto the dashboard (prevents overspray into vents and electronics).
- Wipe in straight lines, working one section at a time (driver side, center stack, passenger side).
- Flip to a clean side of the towel frequently to avoid smearing oils back onto the surface.
- For textured areas, use a soft brush with gentle agitation, then wipe residue with a clean microfiber.
Tip for beginners: If the towel is getting dirty fast, that?s normal. Stop and swap towels before you?re just redistributing grime.
Step 3: Detail the Tight Areas (Vents, Buttons, Seams)
- Spray cleaner onto a small detailing brush or towel corner.
- Lightly work around buttons, knobs, vent slats, and stitched seams.
- Immediately follow with a dry microfiber to remove loosened dirt.
- For vents: use a soft brush and a thin towel wrapped around a trim tool or butter-knife-shaped interior tool (no sharp edges). Move gently along slats.
- For seams: brush along the seam, not across it, to lift debris.
Step 4: Buff Dry for a Factory Finish
This is the step that separates ?clean? from ?pro clean.? Use a dry microfiber to lightly buff the dashboard. You?re removing remaining moisture and preventing streaks.
Step 5: Apply Protectant (Optional, but Recommended)
- Apply a small amount of protectant to an applicator pad (a few drops goes far).
- Spread evenly across the dashboard, working in sections.
- Let it sit for the product?s recommended time (usually 1?5 minutes).
- Buff lightly with a clean microfiber to level the finish and reduce any excess.
Best practice: Keep protectant off steering wheels, pedals, and shifters. Any slickness in control areas is a safety issue.
Special Situations: Fixing the Problems Beginners Run Into Most
Sticky Residue (Spills, Soda, Coffee)
- Start with a gentle interior cleaner on a towel.
- If sticky residue remains, step up to a diluted APC on hard plastic only (test first).
- Use a brush for texture, then wipe and buff dry.
Don?t do this: blasting product into cracks. It can seep behind buttons and create long-term issues.
Sunscreen and Oily Film (The Windshield-Side Grime Line)
Sunscreen is one of the hardest dashboard contaminants because it leaves an oily, reflective film.
- Use a dedicated interior cleaner and a short-nap microfiber for better ?bite.?
- Wipe, flip towel, wipe again.
- Buff dry with a second towel.
If the film persists, repeat rather than using a harsher chemical immediately.
Hazy Gauge Cluster or Clear Plastics
- Use a screen-safe cleaner or a cleaner designed for clear plastics.
- Use the softest microfiber you own (or a dedicated screen towel).
- Wipe with almost no pressure.
Reality check: Many ?hazy? clusters are actually micro-scratches. Aggressive rubbing will worsen it. If scratches are present, consider a plastic polish designed for instrument lenses?used carefully and sparingly.
Piano Black Trim (Scratch Magnet Survival Guide)
- Dust with a blower or very soft brush first.
- Use minimal pressure and a fresh microfiber.
- Avoid circular scrubbing?straight-line wiping reduces visible swirl patterns.
Pro move: Consider a protective film (PPF-style interior film) if you?re particular about keeping piano black perfect.
Product Recommendations: Beginner-Friendly Choices by Category
Exact availability varies by region, but these categories and examples are widely used and proven. Choose products labeled safe for dashboards, vinyl, and plastics.
Interior Cleaner (General Use)
- P&S Xpress Interior Cleaner: popular for a clean, residue-free finish and easy wipe-off.
- Meguiar?s Quik Interior Detailer: convenient for light cleaning and maintenance wipes.
- Griot?s Garage Interior Cleaner: solid all-around option for plastics and vinyl.
Protectant (Matte/Natural Finish)
- 303 Aerospace Protectant: known for UV protection and a natural sheen when buffed properly.
- CarPro PERL (dilutable): versatile protectant; can be adjusted for a more matte interior finish with dilution.
- Meguiar?s Natural Shine Protectant: good choice if you want a simple, non-gloss look.
Screen and Clear Plastic Care
- Dedicated screen cleaner (automotive or electronics-safe) plus a screen microfiber towel.
- Avoid: ammonia-based glass cleaners on tinted or coated screens and clear plastics.
Common Dashboard Cleaning Mistakes to Avoid
- Spraying cleaner directly onto the dashboard: overspray gets into vents, seams, and electronics.
- Using one towel for everything: a towel loaded with grime will streak and can scratch glossy trims.
- Overusing product: more cleaner often equals more residue and more dust attraction.
- Chasing a glossy shine: greasy dressings look ?clean? for five minutes, then attract dust and add windshield glare.
- Scrubbing screens and gauge clusters: these plastics scratch easily?use minimal pressure.
- Cleaning a hot dashboard in direct sun: products flash-dry, leaving blotches and streaks.
- Forgetting to buff: skipping the final dry wipe is why many dashboards look smeary even after ?cleaning.?
Maintenance Plan: Keep It Clean With Minimal Effort
The easiest dashboard to clean is the one you never let get nasty. Here?s a realistic routine that works for most daily drivers.
Weekly (5 minutes)
- Quick vacuum pass across the dash and vents
- Light wipe with an interior detailer on a microfiber towel
Monthly (20?30 minutes)
- Full clean with interior cleaner
- Detail vents, buttons, and seams
- Buff dry for an even finish
Every 2?4 Months (30?45 minutes)
- Clean + apply UV protectant
- Inspect for sticky spots, film buildup, and wear areas
If you park outside: lean toward the shorter end of the protectant interval (every 2 months), and consider a windshield sunshade to reduce heat and UV load.
FAQ: Dashboard Cleaning for Beginners
How often should I clean my dashboard?
Light cleaning weekly or every other week keeps dust from building up. A deeper clean monthly is plenty for most vehicles, with protectant every 2?4 months depending on sun exposure and climate.
What?s the safest way to clean an infotainment screen?
Use a screen-safe cleaner sprayed onto a dedicated microfiber (not directly on the screen). Wipe gently with minimal pressure, then lightly buff with a dry section of the towel to remove streaks.
Can I use household all-purpose cleaner or disinfecting wipes on my dashboard?
It?s risky. Many household cleaners contain solvents, ammonia, or strong detergents that can discolor plastics, strip coatings, or leave a shiny patch. Choose an automotive interior cleaner for dashboards and a screen-safe product for displays.
Why does my dashboard look streaky after cleaning?
Common causes include too much product, cleaning on a hot surface, using a dirty towel, or skipping the final buff. Try spraying less product onto the towel and always finish with a clean, dry microfiber.
Is a dashboard protectant really necessary?
If your car sees sun, yes?especially for preventing fading and drying over time. The key is choosing a matte/natural protectant and buffing it down so it doesn?t look greasy or attract dust.
How do I reduce dust buildup on the dashboard?
Use a protectant that dries to a non-tacky finish, keep your towels clean, and replace or clean cabin air filters on schedule. A quick weekly wipe also prevents heavy buildup that becomes harder to remove.
Next Steps: Your Beginner-to-Confident Dashboard Cleaning Game Plan
If you want immediate results, start with this simple plan:
- Pick one solid interior cleaner and 6 quality microfiber towels.
- Use the ?vacuum ? clean (spray towel) ? detail ? buff? workflow.
- Add a matte UV protectant once your cleaning results are streak-free.
- Stick to the weekly/monthly routine so the dashboard never gets out of control.
For more interior care walkthroughs?screens, leather, fabric, odor control, and full cabin routines?explore the rest of our guides on carinteriormix.com.